Unityのアセット、invectorでのプレイヤーとして操作可能なキャラクターをシーンに追加する方法をまとめました。
Character Creator Windowでキャラクターをシーンに追加する
下記のいずれかの方法でキャラクターの3Dモデルをプレイヤーとしてのキャラクターとしてシーンに追加します。
- Invector>Basic Locomotion>Creat Basic Controller
- Invector>Melee Combat>Create Melee Controller
- Invector>Shooter>Shooter Controller
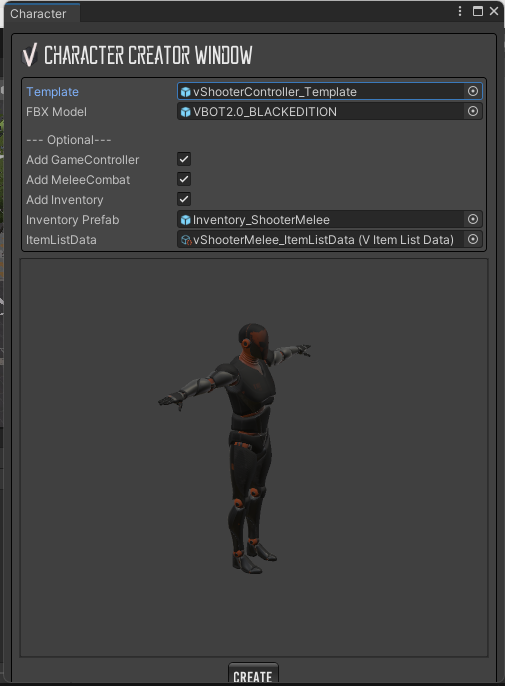
下記の項目を設定できます。
- Template
- FBX Model
- Add Game Controller
- Add Melee Combat
- Add Inventory
- Inventory Prefab
- ItemListData
Template
操作キャラクターのテンプレートです。
FBX Model
操作キャラクターの3Dモデルの設定をします。
操作キャラクターのRagdoll(IK)
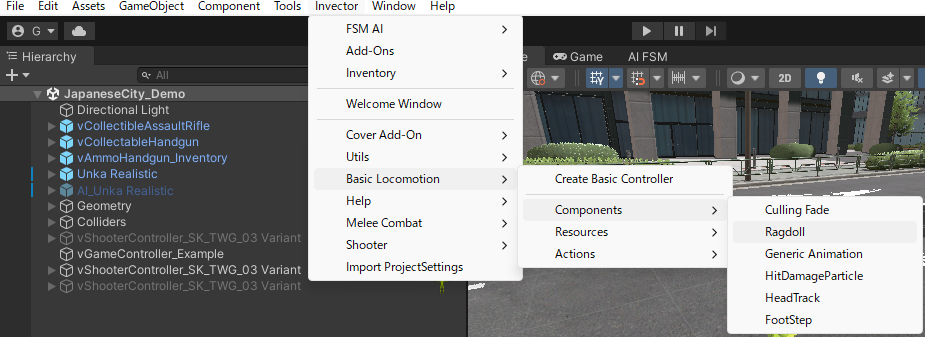
Invector>Basic Locomotion>Components>Ragdoll より、キャラクターのRagdollを設定します。
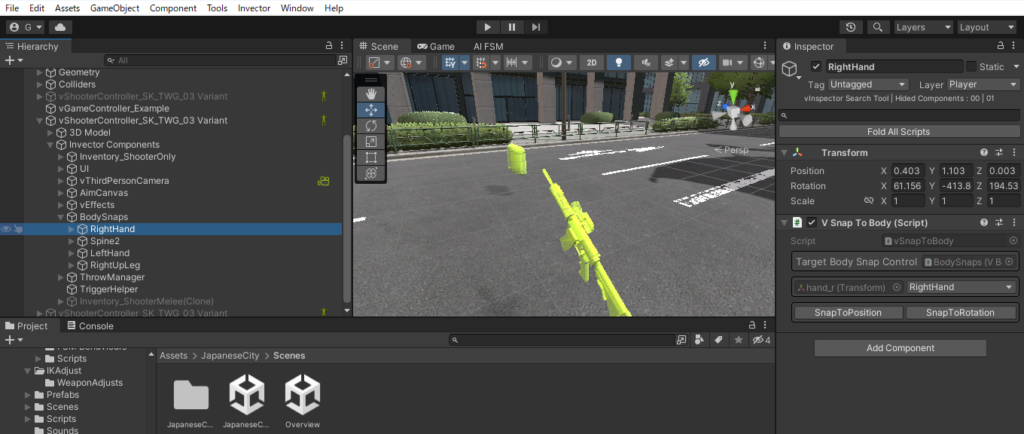
追加したキャラクターのHierarchy(ヒエラルキー)の「Invector Components>Body Snaps>RightHand」配下のRightHand、LeftHandのInspector(インスペクター)から手のIKの設定が確認できます。
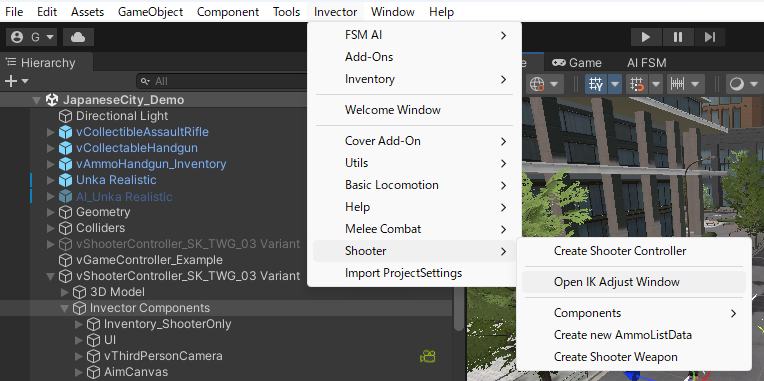
IKの設定を行う
「▶」ボタンをクリックし、Playモードにした状態で「Invector>Shooter>Open IK Adjust Window」をクリックし、プレイヤーのIKを設定します。通常、Playモードでのゲームオブジェクトの操作はPlayモードを終了した際に変更が反映されませんが、このIK windowから設定したIKはPlayモード終了後も操作キャラクターに反映されます。
まとめ
Invectorで操作可能なキャラクターを追加する方法をまとめました。